
 United Kingdom
 France
 Germany
 Netherlands
 Sweden
 USA
USA
 Italy
Italy
 Spain
Spain
Makeup>Nail Art


Archived Product
-
Rebel Nails Nail Wraps
are the UK's leading
brand of nail art
designs: bringing fashion
to the VERY tips of your
fingers and toes. Are you
looking for amazing
beautiful nails in an
instant? Rebel Nails Nail
Wraps come in a wide
range of styles and
designs to create the
stunning nails you have
always dreamed of, which
will be admired by your
friends and family. Rebel
Nails Nail Wraps are a
revolutionary new way of
accessorising your nails.
They are self adhesive
flexible coverings for
your whole nail and can
be used on natural,
acrylic and gel nails.
They will fit virtually
any length, size or
shape of nail. There is
no drying time, no
smudging, no chipping
and no gluing. Here are
just some of the benefits
of using Rebel Nails: -
Easy application, no
drying time - Various
designs to choose from -
They don't chip like
regular varnish - Your
nails will look amazing
24/7 - You can change
your look instantly -
There is no gluing and no
drying time - Receive
compliments wherever you
go. Each pack includes 16
wraps in various sizes.
Directions for use:
Applying Rebel Nails Nail
Wraps is really simple
once you know how. If you
require detailed
instructions please see
the video (scroll down),
or follow the
step-by-step guide below.
Please note, it is
important to always apply
your Rebel Nails to clean
and polish free nails. 1.
Gently push back
cuticles, buff out any
ridges and clean nails
with nail varnish remover
to remove oil, grease
and dust. 2. Select nail
size by placing the
template over your nail,
with the curved end up to
the cuticle. Ensure that
the sides do not overlap
onto the skin. The nails
can be trimmed to fit if
necessary but always do
this before peeling it
from the protective
backing. Do not trim the
length at this time. 3.
Peel the Rebel Nail from
the protective backing by
holding the straight edge
at the top. Try not to
touch the curved end as
this will affect the
adhesive backing. 4.
Using a suitable heat
source i.e. hair dryer,
warm the Rebel Nail
covering for about 10
seconds. 5. Apply nail
covering to your nail,
placing the curved end as
close as possible to the
cuticle without touching
it. Try to place it
correctly the first time
as pulling it on and off
will affect how well it
stays on your nail. 6.
Gently pull the excess
over the end of your nail
letting it stick to your
finger to keep it taught.
Using your thumb smooth
the covering over your
nail working from the
centre to the edges to
ensure there are no
creases and to get a good
seal on the edges. If you
get a crease warm your
nail with a heat source
and smooth it out using
the cuticle stick
provided. 7. Finally file
the excess covering using
downward strokes at a 45
degree angle until the
excess is free then
remove. Removal: Removal
is easy, simply apply a
heat source and peel them
off. It is better for
your nails to peel the
nail wraps from one side
to the other side rather
than top to bottom or
bottom to top. Now you
are ready to apply
another design, colour
or pattern! Like anything
new it may take a few
attempts to get your
Rebel Nails perfect, but
you'll find after a few
applications that you
know exactly which nail
sizes correspond with
your own, and it will
take no time at all to
accessorise your nails
with whatever outfit you
are wearing.
Availability: In Stock
£7.99
Available
-
Rebel Nails Nail Wraps
are the UK's leading
brand of nail art
designs: bringing fashion
to the VERY tips of your
fingers and toes. Are you
looking for amazing
beautiful nails in an
instant? Rebel Nails Nail
Wraps come in a wide
range of styles and
designs to create the
stunning nails you have
always dreamed of, which
will be admired by your
friends and family. Rebel
Nails Nail Wraps are a
revolutionary new way of
accessorising your nails.
They are self adhesive
flexible coverings for
your whole nail and can
be used on natural,
acrylic and gel nails.
They will fit virtually
any length, size or
shape of nail. There is
no drying time, no
smudging, no chipping
and no gluing. Here are
just some of the benefits
of using Rebel Nails: -
Easy application, no
drying time - Various
designs to choose from -
They don't chip like
regular varnish - Your
nails will look amazing
24/7 - You can change
your look instantly -
There is no gluing and no
drying time - Receive
compliments wherever you
go. Each pack includes 16
wraps in various sizes.
Directions for use:
Applying Rebel Nails Nail
Wraps is really simple
once you know how. If you
require detailed
instructions please see
the video (scroll down),
or follow the
step-by-step guide below.
Please note, it is
important to always apply
your Rebel Nails to clean
and polish free nails. 1.
Gently push back
cuticles, buff out any
ridges and clean nails
with nail varnish remover
to remove oil, grease
and dust. 2. Select nail
size by placing the
template over your nail,
with the curved end up to
the cuticle. Ensure that
the sides do not overlap
onto the skin. The nails
can be trimmed to fit if
necessary but always do
this before peeling it
from the protective
backing. Do not trim the
length at this time. 3.
Peel the Rebel Nail from
the protective backing by
holding the straight edge
at the top. Try not to
touch the curved end as
this will affect the
adhesive backing. 4.
Using a suitable heat
source i.e. hair dryer,
warm the Rebel Nail
covering for about 10
seconds. 5. Apply nail
covering to your nail,
placing the curved end as
close as possible to the
cuticle without touching
it. Try to place it
correctly the first time
as pulling it on and off
will affect how well it
stays on your nail. 6.
Gently pull the excess
over the end of your nail
letting it stick to your
finger to keep it taught.
Using your thumb smooth
the covering over your
nail working from the
centre to the edges to
ensure there are no
creases and to get a good
seal on the edges. If you
get a crease warm your
nail with a heat source
and smooth it out using
the cuticle stick
provided. 7. Finally file
the excess covering using
downward strokes at a 45
degree angle until the
excess is free then
remove. Removal: Removal
is easy, simply apply a
heat source and peel them
off. It is better for
your nails to peel the
nail wraps from one side
to the other side rather
than top to bottom or
bottom to top. Now you
are ready to apply
another design, colour
or pattern! Like anything
new it may take a few
attempts to get your
Rebel Nails perfect, but
you'll find after a few
applications that you
know exactly which nail
sizes correspond with
your own, and it will
take no time at all to
accessorise your nails
with whatever outfit you
are wearing.
Availability: In Stock
£7.99
Archived Product
-
Rebel Nails Nail Wraps
are the UK's leading
brand of nail art
designs: bringing fashion
to the VERY tips of your
fingers and toes. Are you
looking for amazing
beautiful nails in an
instant? Rebel Nails Nail
Wraps come in a wide
range of styles and
designs to create the
stunning nails you have
always dreamed of, which
will be admired by your
friends and family. Rebel
Nails Nail Wraps are a
revolutionary new way of
accessorising your nails.
They are self adhesive
flexible coverings for
your whole nail and can
be used on natural,
acrylic and gel nails.
They will fit virtually
any length, size or
shape of nail. There is
no drying time, no
smudging, no chipping
and no gluing. Here are
just some of the benefits
of using Rebel Nails: -
Easy application, no
drying time - Various
designs to choose from -
They don't chip like
regular varnish - Your
nails will look amazing
24/7 - You can change
your look instantly -
There is no gluing and no
drying time - Receive
compliments wherever you
go. Both packs includes
16 wraps (32 total) in
various sizes. Directions
for use: Applying Rebel
Nails Nail Wraps is
really simple once you
know how. If you require
detailed instructions
please see the video
(scroll down), or follow
the step-by-step guide
below. Please note, it
is important to always
apply your Rebel Nails to
clean and polish free
nails. 1. Gently push
back cuticles, buff out
any ridges and clean
nails with nail varnish
remover to remove oil,
grease and dust. 2.
Select nail size by
placing the template over
your nail, with the
curved end up to the
cuticle. Ensure that the
sides do not overlap onto
the skin. The nails can
be trimmed to fit if
necessary but always do
this before peeling it
from the protective
backing. Do not trim the
length at this time. 3.
Peel the Rebel Nail from
the protective backing by
holding the straight edge
at the top. Try not to
touch the curved end as
this will affect the
adhesive backing. 4.
Using a suitable heat
source i.e. hair dryer,
warm the Rebel Nail
covering for about 10
seconds. 5. Apply nail
covering to your nail,
placing the curved end as
close as possible to the
cuticle without touching
it. Try to place it
correctly the first time
as pulling it on and off
will affect how well it
stays on your nail. 6.
Gently pull the excess
over the end of your nail
letting it stick to your
finger to keep it taught.
Using your thumb smooth
the covering over your
nail working from the
centre to the edges to
ensure there are no
creases and to get a good
seal on the edges. If you
get a crease warm your
nail with a heat source
and smooth it out using
the cuticle stick
provided. 7. Finally file
the excess covering using
downward strokes at a 45
degree angle until the
excess is free then
remove. Removal: Removal
is easy, simply apply a
heat source and peel them
off. It is better for
your nails to peel the
nail wraps from one side
to the other side rather
than top to bottom or
bottom to top. Now you
are ready to apply
another design, colour
or pattern! Like anything
new it may take a few
attempts to get your
Rebel Nails perfect, but
you'll find after a few
applications that you
know exactly which nail
sizes correspond with
your own, and it will
take no time at all to
accessorise your nails
with whatever outfit you
are wearing.
Availability: In Stock
£9.98
Available
-
Rebel Nails Nail Wraps
are the UK's leading
brand of nail art
designs: bringing fashion
to the VERY tips of your
fingers and toes. Are you
looking for amazing
beautiful nails in an
instant? Rebel Nails Nail
Wraps come in a wide
range of styles and
designs to create the
stunning nails you have
always dreamed of, which
will be admired by your
friends and family. Rebel
Nails Nail Wraps are a
revolutionary new way of
accessorising your nails.
They are self adhesive
flexible coverings for
your whole nail and can
be used on natural,
acrylic and gel nails.
They will fit virtually
any length, size or
shape of nail. There is
no drying time, no
smudging, no chipping
and no gluing. Here are
just some of the benefits
of using Rebel Nails: -
Easy application, no
drying time - Various
designs to choose from -
They don't chip like
regular varnish - Your
nails will look amazing
24/7 - You can change
your look instantly -
There is no gluing and no
drying time - Receive
compliments wherever you
go. Each pack includes 16
wraps in various sizes.
Directions for use:
Applying Rebel Nails Nail
Wraps is really simple
once you know how. If you
require detailed
instructions please see
the video (scroll down),
or follow the
step-by-step guide below.
Please note, it is
important to always apply
your Rebel Nails to clean
and polish free nails. 1.
Gently push back
cuticles, buff out any
ridges and clean nails
with nail varnish remover
to remove oil, grease
and dust. 2. Select nail
size by placing the
template over your nail,
with the curved end up to
the cuticle. Ensure that
the sides do not overlap
onto the skin. The nails
can be trimmed to fit if
necessary but always do
this before peeling it
from the protective
backing. Do not trim the
length at this time. 3.
Peel the Rebel Nail from
the protective backing by
holding the straight edge
at the top. Try not to
touch the curved end as
this will affect the
adhesive backing. 4.
Using a suitable heat
source i.e. hair dryer,
warm the Rebel Nail
covering for about 10
seconds. 5. Apply nail
covering to your nail,
placing the curved end as
close as possible to the
cuticle without touching
it. Try to place it
correctly the first time
as pulling it on and off
will affect how well it
stays on your nail. 6.
Gently pull the excess
over the end of your nail
letting it stick to your
finger to keep it taught.
Using your thumb smooth
the covering over your
nail working from the
centre to the edges to
ensure there are no
creases and to get a good
seal on the edges. If you
get a crease warm your
nail with a heat source
and smooth it out using
the cuticle stick
provided. 7. Finally file
the excess covering using
downward strokes at a 45
degree angle until the
excess is free then
remove. Removal: Removal
is easy, simply apply a
heat source and peel them
off. It is better for
your nails to peel the
nail wraps from one side
to the other side rather
than top to bottom or
bottom to top. Now you
are ready to apply
another design, colour
or pattern! Like anything
new it may take a few
attempts to get your
Rebel Nails perfect, but
you'll find after a few
applications that you
know exactly which nail
sizes correspond with
your own, and it will
take no time at all to
accessorise your nails
with whatever outfit you
are wearing.
Availability: In Stock
£7.99
Available
-
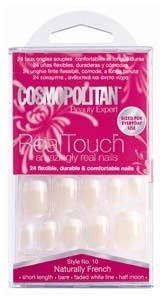
Style No. 11 - Naturally
French. Short length.
Pink. Faded white line.
24 flexible, durable and
comfortable nails. Sized
for everyday use. Pink
gel glue inside. From the
Beauty Experts at
Cosmopolitan comes
RealTouch Amazingly Real
Nails, a collection of
beautifully natural
salon-quality nails.
Availability: In Stock
£5.50
Available
-
Style No. 12 - Say It
With... Medium length.
Pink with floral design.
Clean white line. 24
flexible, durable and
comfortable nails. Sized
for everyday use. Pink
gel glue inside. From the
Beauty Experts at
Cosmopolitan comes
RealTouch Amazingly Real
Nails, a collection of
beautifully natural
salon-quality nails.
Availability: In Stock
£6.50
Available
-
Style No. 14 - Midnight
Blue. Medium length.
Elegant side shadow
effect. 24 flexible,
durable and comfortable
nails. Sized for everyday
use. Pink gel glue
inside. From the Beauty
Experts at Cosmopolitan
comes RealTouch Amazingly
Real Nails, a collection
of beautifully natural
salon-quality nails.
Simple application: 1.
Push back cuticles and
apply an even, thin
layer of glue onto your
natural nail. 2. Place
Cosmopolitan Beauty
Expert RealTouch
Amazingly Real Nail up to
your cuticle and lower
gently. 3. Press firmly
and carefully for
approximately 5 seconds
until set.
Availability: In Stock
£5.95
Available
-
Rebel Nails Nail Wraps
are the UK's leading
brand of nail art
designs: bringing fashion
to the VERY tips of your
fingers and toes. Are you
looking for amazing
beautiful nails in an
instant? Rebel Nails Nail
Wraps come in a wide
range of styles and
designs to create the
stunning nails you have
always dreamed of, which
will be admired by your
friends and family. Rebel
Nails Nail Wraps are a
revolutionary new way of
accessorising your nails.
They are self adhesive
flexible coverings for
your whole nail and can
be used on natural,
acrylic and gel nails.
They will fit virtually
any length, size or
shape of nail. There is
no drying time, no
smudging, no chipping
and no gluing. Here are
just some of the benefits
of using Rebel Nails: -
Easy application, no
drying time - Various
designs to choose from -
They don't chip like
regular varnish - Your
nails will look amazing
24/7 - You can change
your look instantly -
There is no gluing and no
drying time - Receive
compliments wherever you
go. Each pack includes 16
wraps in various sizes.
Directions for use:
Applying Rebel Nails Nail
Wraps is really simple
once you know how. If you
require detailed
instructions please see
the video (scroll down),
or follow the
step-by-step guide below.
Please note, it is
important to always apply
your Rebel Nails to clean
and polish free nails. 1.
Gently push back
cuticles, buff out any
ridges and clean nails
with nail varnish remover
to remove oil, grease
and dust. 2. Select nail
size by placing the
template over your nail,
with the curved end up to
the cuticle. Ensure that
the sides do not overlap
onto the skin. The nails
can be trimmed to fit if
necessary but always do
this before peeling it
from the protective
backing. Do not trim the
length at this time. 3.
Peel the Rebel Nail from
the protective backing by
holding the straight edge
at the top. Try not to
touch the curved end as
this will affect the
adhesive backing. 4.
Using a suitable heat
source i.e. hair dryer,
warm the Rebel Nail
covering for about 10
seconds. 5. Apply nail
covering to your nail,
placing the curved end as
close as possible to the
cuticle without touching
it. Try to place it
correctly the first time
as pulling it on and off
will affect how well it
stays on your nail. 6.
Gently pull the excess
over the end of your nail
letting it stick to your
finger to keep it taught.
Using your thumb smooth
the covering over your
nail working from the
centre to the edges to
ensure there are no
creases and to get a good
seal on the edges. If you
get a crease warm your
nail with a heat source
and smooth it out using
the cuticle stick
provided. 7. Finally file
the excess covering using
downward strokes at a 45
degree angle until the
excess is free then
remove. Removal: Removal
is easy, simply apply a
heat source and peel them
off. It is better for
your nails to peel the
nail wraps from one side
to the other side rather
than top to bottom or
bottom to top. Now you
are ready to apply
another design, colour
or pattern! Like anything
new it may take a few
attempts to get your
Rebel Nails perfect, but
you'll find after a few
applications that you
know exactly which nail
sizes correspond with
your own, and it will
take no time at all to
accessorise your nails
with whatever outfit you
are wearing.
Availability: In Stock
£7.99
Available
-
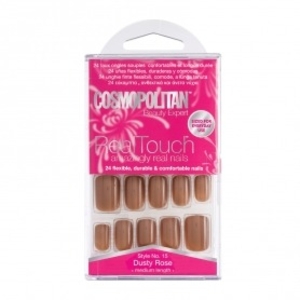
Style No. 15 - Dusty
Rose. Medium length. 24
flexible, durable and
comfortable nails. Sized
for everyday use. Pink
gel glue inside. From the
Beauty Experts at
Cosmopolitan comes
RealTouch Amazingly Real
Nails, a collection of
beautifully natural
salon-quality nails.
Availability: In Stock
£5.95
Available
-
Style No. 21 - Secret
Rendezvous. Medium
length. Elegant side
shadow effect. 24
flexible, durable and
comfortable nails. Sized
for everyday use. Pink
gel glue inside. From the
Beauty Experts at
Cosmopolitan comes
RealTouch Amazingly Real
Nails, a collection of
beautifully natural
salon-quality nails.
Simple application: 1.
Push back cuticles and
apply an even, thin
layer of glue onto your
natural nail. 2. Place
Cosmopolitan Beauty
Expert RealTouch
Amazingly Real Nail up to
your cuticle and lower
gently. 3. Press firmly
and carefully for
approximately 5 seconds
until set.
Availability: In Stock
£5.95
Available
-
Black & White Zebra Nail
Wraps are nails inc's way
of bringing the hottest
catwalk trends to your
nails. nails inc Nail
Wraps are easy to use and
will create a show
stopping finish. Try this
exciting new trend which
is perfect for parties,
special events or
holidays. Each nails inc
Nail Wrap pack includes
24 wraps for a full set
of hands and feet (with
spares)! Directions for
use: 1. Remove any nail
polish and push back your
cuticles using a hoof
stick. 2. File your nails
to the desired shape and
length. For best results
always make sure your
nails are slightly longer
than the top of your
finger. 3. Gently buff
your nails using a nail
buffer to remove surface
shine. 4. Select the
nails inc Nail Wrap that
is the closest size to
your nail. Trim to fit if
needed using nail
scissors. Don't worry
about excess length as
this will be trimmed
later. 5. Heat the wrap
for a few seconds using a
hair dryer on a gentle
heat. The wrap should
start to soften and bend.
6. Carefully place the
wrap on the nail starting
at the cuticle (colour
side facing upwards).
Applying firm pressure,
push the wrap onto one
side of the nail and then
to the other until the
whole wrap is neatly
applied to the nail. 7.
Re-apply heat for a few
seconds and push firmly
over the entire nails for
a secure fit. If you
experience any creasing;
re-heat, gently lift the
wrap off the nail and
re-apply adding further
heat if necessary. 8.
Trim the end of the wrap
and then file the excess
in a downward motion
either using a glass file
or a wooden file with a
very fine grain.
Availability: In Stock
£7.95
Available
-
Rebel Nails Nail Wraps
are the UK's leading
brand of nail art
designs: bringing fashion
to the VERY tips of your
fingers and toes. Are you
looking for amazing
beautiful nails in an
instant? Rebel Nails Nail
Wraps come in a wide
range of styles and
designs to create the
stunning nails you have
always dreamed of, which
will be admired by your
friends and family. Rebel
Nails Nail Wraps are a
revolutionary new way of
accessorising your nails.
They are self adhesive
flexible coverings for
your whole nail and can
be used on natural,
acrylic and gel nails.
They will fit virtually
any length, size or
shape of nail. There is
no drying time, no
smudging, no chipping
and no gluing. Here are
just some of the benefits
of using Rebel Nails: -
Easy application, no
drying time - Various
designs to choose from -
They don't chip like
regular varnish - Your
nails will look amazing
24/7 - You can change
your look instantly -
There is no gluing and no
drying time - Receive
compliments wherever you
go. Each pack includes 16
wraps in various sizes.
Directions for use:
Applying Rebel Nails Nail
Wraps is really simple
once you know how. If you
require detailed
instructions please see
the video (scroll down),
or follow the
step-by-step guide below.
Please note, it is
important to always apply
your Rebel Nails to clean
and polish free nails. 1.
Gently push back
cuticles, buff out any
ridges and clean nails
with nail varnish remover
to remove oil, grease
and dust. 2. Select nail
size by placing the
template over your nail,
with the curved end up to
the cuticle. Ensure that
the sides do not overlap
onto the skin. The nails
can be trimmed to fit if
necessary but always do
this before peeling it
from the protective
backing. Do not trim the
length at this time. 3.
Peel the Rebel Nail from
the protective backing by
holding the straight edge
at the top. Try not to
touch the curved end as
this will affect the
adhesive backing. 4.
Using a suitable heat
source i.e. hair dryer,
warm the Rebel Nail
covering for about 10
seconds. 5. Apply nail
covering to your nail,
placing the curved end as
close as possible to the
cuticle without touching
it. Try to place it
correctly the first time
as pulling it on and off
will affect how well it
stays on your nail. 6.
Gently pull the excess
over the end of your nail
letting it stick to your
finger to keep it taught.
Using your thumb smooth
the covering over your
nail working from the
centre to the edges to
ensure there are no
creases and to get a good
seal on the edges. If you
get a crease warm your
nail with a heat source
and smooth it out using
the cuticle stick
provided. 7. Finally file
the excess covering using
downward strokes at a 45
degree angle until the
excess is free then
remove. Removal: Removal
is easy, simply apply a
heat source and peel them
off. It is better for
your nails to peel the
nail wraps from one side
to the other side rather
than top to bottom or
bottom to top. Now you
are ready to apply
another design, colour
or pattern! Like anything
new it may take a few
attempts to get your
Rebel Nails perfect, but
you'll find after a few
applications that you
know exactly which nail
sizes correspond with
your own, and it will
take no time at all to
accessorise your nails
with whatever outfit you
are wearing.
Availability: In Stock
£7.99
Available
-
Rebel Nails Nail Wraps
are the UK's leading
brand of nail art
designs: bringing fashion
to the VERY tips of your
fingers and toes. Are you
looking for amazing
beautiful nails in an
instant? Rebel Nails Nail
Wraps come in a wide
range of styles and
designs to create the
stunning nails you have
always dreamed of, which
will be admired by your
friends and family. Rebel
Nails Nail Wraps are a
revolutionary new way of
accessorising your nails.
They are self adhesive
flexible coverings for
your whole nail and can
be used on natural,
acrylic and gel nails.
They will fit virtually
any length, size or
shape of nail. There is
no drying time, no
smudging, no chipping
and no gluing. Here are
just some of the benefits
of using Rebel Nails: -
Easy application, no
drying time - Various
designs to choose from -
They don't chip like
regular varnish - Your
nails will look amazing
24/7 - You can change
your look instantly -
There is no gluing and no
drying time - Receive
compliments wherever you
go. Each pack includes 16
wraps in various sizes.
Directions for use:
Applying Rebel Nails Nail
Wraps is really simple
once you know how. If you
require detailed
instructions please see
the video (scroll down),
or follow the
step-by-step guide below.
Please note, it is
important to always apply
your Rebel Nails to clean
and polish free nails. 1.
Gently push back
cuticles, buff out any
ridges and clean nails
with nail varnish remover
to remove oil, grease
and dust. 2. Select nail
size by placing the
template over your nail,
with the curved end up to
the cuticle. Ensure that
the sides do not overlap
onto the skin. The nails
can be trimmed to fit if
necessary but always do
this before peeling it
from the protective
backing. Do not trim the
length at this time. 3.
Peel the Rebel Nail from
the protective backing by
holding the straight edge
at the top. Try not to
touch the curved end as
this will affect the
adhesive backing. 4.
Using a suitable heat
source i.e. hair dryer,
warm the Rebel Nail
covering for about 10
seconds. 5. Apply nail
covering to your nail,
placing the curved end as
close as possible to the
cuticle without touching
it. Try to place it
correctly the first time
as pulling it on and off
will affect how well it
stays on your nail. 6.
Gently pull the excess
over the end of your nail
letting it stick to your
finger to keep it taught.
Using your thumb smooth
the covering over your
nail working from the
centre to the edges to
ensure there are no
creases and to get a good
seal on the edges. If you
get a crease warm your
nail with a heat source
and smooth it out using
the cuticle stick
provided. 7. Finally file
the excess covering using
downward strokes at a 45
degree angle until the
excess is free then
remove. Removal: Removal
is easy, simply apply a
heat source and peel them
off. It is better for
your nails to peel the
nail wraps from one side
to the other side rather
than top to bottom or
bottom to top. Now you
are ready to apply
another design, colour
or pattern! Like anything
new it may take a few
attempts to get your
Rebel Nails perfect, but
you'll find after a few
applications that you
know exactly which nail
sizes correspond with
your own, and it will
take no time at all to
accessorise your nails
with whatever outfit you
are wearing.
Availability: In Stock
£7.99
Archived Product
-
Rebel Nails Nail Wraps
are the UK's leading
brand of nail art
designs: bringing fashion
to the VERY tips of your
fingers and toes. Are you
looking for amazing
beautiful nails in an
instant? Rebel Nails Nail
Wraps come in a wide
range of styles and
designs to create the
stunning nails you have
always dreamed of, which
will be admired by your
friends and family. Rebel
Nails Nail Wraps are a
revolutionary new way of
accessorising your nails.
They are self adhesive
flexible coverings for
your whole nail and can
be used on natural,
acrylic and gel nails.
They will fit virtually
any length, size or
shape of nail. There is
no drying time, no
smudging, no chipping
and no gluing. Here are
just some of the benefits
of using Rebel Nails: -
Easy application, no
drying time - Various
designs to choose from -
They don't chip like
regular varnish - Your
nails will look amazing
24/7 - You can change
your look instantly -
There is no gluing and no
drying time - Receive
compliments wherever you
go. Each pack includes 16
wraps in various sizes.
Directions for use:
Applying Rebel Nails Nail
Wraps is really simple
once you know how. If you
require detailed
instructions please see
the video (scroll down),
or follow the
step-by-step guide below.
Please note, it is
important to always apply
your Rebel Nails to clean
and polish free nails. 1.
Gently push back
cuticles, buff out any
ridges and clean nails
with nail varnish remover
to remove oil, grease
and dust. 2. Select nail
size by placing the
template over your nail,
with the curved end up to
the cuticle. Ensure that
the sides do not overlap
onto the skin. The nails
can be trimmed to fit if
necessary but always do
this before peeling it
from the protective
backing. Do not trim the
length at this time. 3.
Peel the Rebel Nail from
the protective backing by
holding the straight edge
at the top. Try not to
touch the curved end as
this will affect the
adhesive backing. 4.
Using a suitable heat
source i.e. hair dryer,
warm the Rebel Nail
covering for about 10
seconds. 5. Apply nail
covering to your nail,
placing the curved end as
close as possible to the
cuticle without touching
it. Try to place it
correctly the first time
as pulling it on and off
will affect how well it
stays on your nail. 6.
Gently pull the excess
over the end of your nail
letting it stick to your
finger to keep it taught.
Using your thumb smooth
the covering over your
nail working from the
centre to the edges to
ensure there are no
creases and to get a good
seal on the edges. If you
get a crease warm your
nail with a heat source
and smooth it out using
the cuticle stick
provided. 7. Finally file
the excess covering using
downward strokes at a 45
degree angle until the
excess is free then
remove. Removal: Removal
is easy, simply apply a
heat source and peel them
off. It is better for
your nails to peel the
nail wraps from one side
to the other side rather
than top to bottom or
bottom to top. Now you
are ready to apply
another design, colour
or pattern! Like anything
new it may take a few
attempts to get your
Rebel Nails perfect, but
you'll find after a few
applications that you
know exactly which nail
sizes correspond with
your own, and it will
take no time at all to
accessorise your nails
with whatever outfit you
are wearing.
Availability: In Stock
£7.99
Available
-
Rebel Nails Nail Wraps
are the UK's leading
brand of nail art
designs: bringing fashion
to the VERY tips of your
fingers and toes. Are you
looking for amazing
beautiful nails in an
instant? Rebel Nails Nail
Wraps come in a wide
range of styles and
designs to create the
stunning nails you have
always dreamed of, which
will be admired by your
friends and family. Rebel
Nails Nail Wraps are a
revolutionary new way of
accessorising your nails.
They are self adhesive
flexible coverings for
your whole nail and can
be used on natural,
acrylic and gel nails.
They will fit virtually
any length, size or
shape of nail. There is
no drying time, no
smudging, no chipping
and no gluing. Here are
just some of the benefits
of using Rebel Nails: -
Easy application, no
drying time - Various
designs to choose from -
They don't chip like
regular varnish - Your
nails will look amazing
24/7 - You can change
your look instantly -
There is no gluing and no
drying time - Receive
compliments wherever you
go. Each pack includes 16
wraps in various sizes.
Directions for use:
Applying Rebel Nails Nail
Wraps is really simple
once you know how. If you
require detailed
instructions please see
the video (scroll down),
or follow the
step-by-step guide below.
Please note, it is
important to always apply
your Rebel Nails to clean
and polish free nails. 1.
Gently push back
cuticles, buff out any
ridges and clean nails
with nail varnish remover
to remove oil, grease
and dust. 2. Select nail
size by placing the
template over your nail,
with the curved end up to
the cuticle. Ensure that
the sides do not overlap
onto the skin. The nails
can be trimmed to fit if
necessary but always do
this before peeling it
from the protective
backing. Do not trim the
length at this time. 3.
Peel the Rebel Nail from
the protective backing by
holding the straight edge
at the top. Try not to
touch the curved end as
this will affect the
adhesive backing. 4.
Using a suitable heat
source i.e. hair dryer,
warm the Rebel Nail
covering for about 10
seconds. 5. Apply nail
covering to your nail,
placing the curved end as
close as possible to the
cuticle without touching
it. Try to place it
correctly the first time
as pulling it on and off
will affect how well it
stays on your nail. 6.
Gently pull the excess
over the end of your nail
letting it stick to your
finger to keep it taught.
Using your thumb smooth
the covering over your
nail working from the
centre to the edges to
ensure there are no
creases and to get a good
seal on the edges. If you
get a crease warm your
nail with a heat source
and smooth it out using
the cuticle stick
provided. 7. Finally file
the excess covering using
downward strokes at a 45
degree angle until the
excess is free then
remove. Removal: Removal
is easy, simply apply a
heat source and peel them
off. It is better for
your nails to peel the
nail wraps from one side
to the other side rather
than top to bottom or
bottom to top. Now you
are ready to apply
another design, colour
or pattern! Like anything
new it may take a few
attempts to get your
Rebel Nails perfect, but
you'll find after a few
applications that you
know exactly which nail
sizes correspond with
your own, and it will
take no time at all to
accessorise your nails
with whatever outfit you
are wearing.
Availability: In Stock
£7.99
Available
-
Gold Leopard Print Nail
Wraps are nails inc's way
of bringing the hottest
catwalk trends to your
nails. nails inc Nail
Wraps are easy to use and
will create a show
stopping finish. Try this
exciting new trend which
is perfect for parties,
special events or
holidays. Each nails inc
Nail Wrap pack includes
24 wraps for a full set
of hands and feet (with
spares)!
Availability: In Stock
£7.95
Available
-
Rebel Nails Nail Wraps
are the UK's leading
brand of nail art
designs: bringing fashion
to the VERY tips of your
fingers and toes. Are you
looking for amazing
beautiful nails in an
instant? Rebel Nails Nail
Wraps come in a wide
range of styles and
designs to create the
stunning nails you have
always dreamed of, which
will be admired by your
friends and family. Rebel
Nails Nail Wraps are a
revolutionary new way of
accessorising your nails.
They are self adhesive
flexible coverings for
your whole nail and can
be used on natural,
acrylic and gel nails.
They will fit virtually
any length, size or
shape of nail. There is
no drying time, no
smudging, no chipping
and no gluing. Here are
just some of the benefits
of using Rebel Nails: -
Easy application, no
drying time - Various
designs to choose from -
They don't chip like
regular varnish - Your
nails will look amazing
24/7 - You can change
your look instantly -
There is no gluing and no
drying time - Receive
compliments wherever you
go. Each pack includes 16
wraps in various sizes.
Directions for use:
Applying Rebel Nails Nail
Wraps is really simple
once you know how. If you
require detailed
instructions please see
the video (scroll down),
or follow the
step-by-step guide below.
Please note, it is
important to always apply
your Rebel Nails to clean
and polish free nails. 1.
Gently push back
cuticles, buff out any
ridges and clean nails
with nail varnish remover
to remove oil, grease
and dust. 2. Select nail
size by placing the
template over your nail,
with the curved end up to
the cuticle. Ensure that
the sides do not overlap
onto the skin. The nails
can be trimmed to fit if
necessary but always do
this before peeling it
from the protective
backing. Do not trim the
length at this time. 3.
Peel the Rebel Nail from
the protective backing by
holding the straight edge
at the top. Try not to
touch the curved end as
this will affect the
adhesive backing. 4.
Using a suitable heat
source i.e. hair dryer,
warm the Rebel Nail
covering for about 10
seconds. 5. Apply nail
covering to your nail,
placing the curved end as
close as possible to the
cuticle without touching
it. Try to place it
correctly the first time
as pulling it on and off
will affect how well it
stays on your nail. 6.
Gently pull the excess
over the end of your nail
letting it stick to your
finger to keep it taught.
Using your thumb smooth
the covering over your
nail working from the
centre to the edges to
ensure there are no
creases and to get a good
seal on the edges. If you
get a crease warm your
nail with a heat source
and smooth it out using
the cuticle stick
provided. 7. Finally file
the excess covering using
downward strokes at a 45
degree angle until the
excess is free then
remove. Removal: Removal
is easy, simply apply a
heat source and peel them
off. It is better for
your nails to peel the
nail wraps from one side
to the other side rather
than top to bottom or
bottom to top. Now you
are ready to apply
another design, colour
or pattern! Like anything
new it may take a few
attempts to get your
Rebel Nails perfect, but
you'll find after a few
applications that you
know exactly which nail
sizes correspond with
your own, and it will
take no time at all to
accessorise your nails
with whatever outfit you
are wearing.
Availability: In Stock
£7.99
Available
-
Purple Leopard Print Nail
Wraps are nails inc's way
of bringing the hottest
catwalk trends to your
nails. nails inc Nail
Wraps are easy to use and
will create a show
stopping finish. Try this
exciting new trend which
is perfect for parties,
special events or
holidays. Each nails inc
Nail Wrap pack includes
24 wraps for a full set
of hands and feet (with
spares)!
Availability: In Stock
£7.95
Archived Product
-
Rebel Nails Nail Wraps
are the UK's leading
brand of nail art
designs: bringing fashion
to the VERY tips of your
fingers and toes. Are you
looking for amazing
beautiful nails in an
instant? Rebel Nails Nail
Wraps come in a wide
range of styles and
designs to create the
stunning nails you have
always dreamed of, which
will be admired by your
friends and family. Rebel
Nails Nail Wraps are a
revolutionary new way of
accessorising your nails.
They are self adhesive
flexible coverings for
your whole nail and can
be used on natural,
acrylic and gel nails.
They will fit virtually
any length, size or
shape of nail. There is
no drying time, no
smudging, no chipping
and no gluing. Here are
just some of the benefits
of using Rebel Nails: -
Easy application, no
drying time - Various
designs to choose from -
They don't chip like
regular varnish - Your
nails will look amazing
24/7 - You can change
your look instantly -
There is no gluing and no
drying time - Receive
compliments wherever you
go. Each pack includes 16
wraps in various sizes.
Directions for use:
Applying Rebel Nails Nail
Wraps is really simple
once you know how. If you
require detailed
instructions please see
the video (scroll down),
or follow the
step-by-step guide below.
Please note, it is
important to always apply
your Rebel Nails to clean
and polish free nails. 1.
Gently push back
cuticles, buff out any
ridges and clean nails
with nail varnish remover
to remove oil, grease
and dust. 2. Select nail
size by placing the
template over your nail,
with the curved end up to
the cuticle. Ensure that
the sides do not overlap
onto the skin. The nails
can be trimmed to fit if
necessary but always do
this before peeling it
from the protective
backing. Do not trim the
length at this time. 3.
Peel the Rebel Nail from
the protective backing by
holding the straight edge
at the top. Try not to
touch the curved end as
this will affect the
adhesive backing. 4.
Using a suitable heat
source i.e. hair dryer,
warm the Rebel Nail
covering for about 10
seconds. 5. Apply nail
covering to your nail,
placing the curved end as
close as possible to the
cuticle without touching
it. Try to place it
correctly the first time
as pulling it on and off
will affect how well it
stays on your nail. 6.
Gently pull the excess
over the end of your nail
letting it stick to your
finger to keep it taught.
Using your thumb smooth
the covering over your
nail working from the
centre to the edges to
ensure there are no
creases and to get a good
seal on the edges. If you
get a crease warm your
nail with a heat source
and smooth it out using
the cuticle stick
provided. 7. Finally file
the excess covering using
downward strokes at a 45
degree angle until the
excess is free then
remove. Removal: Removal
is easy, simply apply a
heat source and peel them
off. It is better for
your nails to peel the
nail wraps from one side
to the other side rather
than top to bottom or
bottom to top. Now you
are ready to apply
another design, colour
or pattern! Like anything
new it may take a few
attempts to get your
Rebel Nails perfect, but
you'll find after a few
applications that you
know exactly which nail
sizes correspond with
your own, and it will
take no time at all to
accessorise your nails
with whatever outfit you
are wearing.
Availability: In Stock
£7.99
Available
-
Solid Gold Nail Wraps are
nails inc's way of
bringing the hottest
catwalk trends to your
nails. nails inc Nail
Wraps are easy to use and
will create a show
stopping finish. Try this
exciting new trend which
is perfect for parties,
special events or
holidays. Each nails inc
Nail Wrap pack includes
24 wraps for a full set
of hands and feet (with
spares)!
Availability: In Stock
£7.95
Archived Product
-
Rebel Nails Nail Wraps
are the UK's leading
brand of nail art
designs: bringing fashion
to the VERY tips of your
fingers and toes. Are you
looking for amazing
beautiful nails in an
instant? Rebel Nails Nail
Wraps come in a wide
range of styles and
designs to create the
stunning nails you have
always dreamed of, which
will be admired by your
friends and family. Rebel
Nails Nail Wraps are a
revolutionary new way of
accessorising your nails.
They are self adhesive
flexible coverings for
your whole nail and can
be used on natural,
acrylic and gel nails.
They will fit virtually
any length, size or
shape of nail. There is
no drying time, no
smudging, no chipping
and no gluing. Here are
just some of the benefits
of using Rebel Nails: -
Easy application, no
drying time - Various
designs to choose from -
They don't chip like
regular varnish - Your
nails will look amazing
24/7 - You can change
your look instantly -
There is no gluing and no
drying time - Receive
compliments wherever you
go. Each pack includes 16
wraps in various sizes.
Directions for use:
Applying Rebel Nails Nail
Wraps is really simple
once you know how. If you
require detailed
instructions please see
the video (scroll down),
or follow the
step-by-step guide below.
Please note, it is
important to always apply
your Rebel Nails to clean
and polish free nails. 1.
Gently push back
cuticles, buff out any
ridges and clean nails
with nail varnish remover
to remove oil, grease
and dust. 2. Select nail
size by placing the
template over your nail,
with the curved end up to
the cuticle. Ensure that
the sides do not overlap
onto the skin. The nails
can be trimmed to fit if
necessary but always do
this before peeling it
from the protective
backing. Do not trim the
length at this time. 3.
Peel the Rebel Nail from
the protective backing by
holding the straight edge
at the top. Try not to
touch the curved end as
this will affect the
adhesive backing. 4.
Using a suitable heat
source i.e. hair dryer,
warm the Rebel Nail
covering for about 10
seconds. 5. Apply nail
covering to your nail,
placing the curved end as
close as possible to the
cuticle without touching
it. Try to place it
correctly the first time
as pulling it on and off
will affect how well it
stays on your nail. 6.
Gently pull the excess
over the end of your nail
letting it stick to your
finger to keep it taught.
Using your thumb smooth
the covering over your
nail working from the
centre to the edges to
ensure there are no
creases and to get a good
seal on the edges. If you
get a crease warm your
nail with a heat source
and smooth it out using
the cuticle stick
provided. 7. Finally file
the excess covering using
downward strokes at a 45
degree angle until the
excess is free then
remove. Removal: Removal
is easy, simply apply a
heat source and peel them
off. It is better for
your nails to peel the
nail wraps from one side
to the other side rather
than top to bottom or
bottom to top. Now you
are ready to apply
another design, colour
or pattern! Like anything
new it may take a few
attempts to get your
Rebel Nails perfect, but
you'll find after a few
applications that you
know exactly which nail
sizes correspond with
your own, and it will
take no time at all to
accessorise your nails
with whatever outfit you
are wearing.
Availability: In Stock
£7.99
Available
-
Rebel Nails Nail Wraps
are the UK's leading
brand of nail art
designs: bringing fashion
to the VERY tips of your
fingers and toes. Are you
looking for amazing
beautiful nails in an
instant? Rebel Nails Nail
Wraps come in a wide
range of styles and
designs to create the
stunning nails you have
always dreamed of, which
will be admired by your
friends and family. Rebel
Nails Nail Wraps are a
revolutionary new way of
accessorising your nails.
They are self adhesive
flexible coverings for
your whole nail and can
be used on natural,
acrylic and gel nails.
They will fit virtually
any length, size or
shape of nail. There is
no drying time, no
smudging, no chipping
and no gluing. Here are
just some of the benefits
of using Rebel Nails: -
Easy application, no
drying time - Various
designs to choose from -
They don't chip like
regular varnish - Your
nails will look amazing
24/7 - You can change
your look instantly -
There is no gluing and no
drying time - Receive
compliments wherever you
go. Perfect 22 Carat Gold
nails every time. Each
pack includes 16 wraps in
various sizes. Directions
for use: Applying Rebel
Nails Nail Wraps is
really simple once you
know how. If you require
detailed instructions
please see the video
(scroll down), or follow
the step-by-step guide
below. Please note, it
is important to always
apply your Rebel Nails to
clean and polish free
nails. 1. Gently push
back cuticles, buff out
any ridges and clean
nails with nail varnish
remover to remove oil,
grease and dust. 2.
Select nail size by
placing the template over
your nail, with the
curved end up to the
cuticle. Ensure that the
sides do not overlap onto
the skin. The nails can
be trimmed to fit if
necessary but always do
this before peeling it
from the protective
backing. Do not trim the
length at this time. 3.
Peel the Rebel Nail from
the protective backing by
holding the straight edge
at the top. Try not to
touch the curved end as
this will affect the
adhesive backing. 4.
Using a suitable heat
source i.e. hair dryer,
warm the Rebel Nail
covering for about 10
seconds. 5. Apply nail
covering to your nail,
placing the curved end as
close as possible to the
cuticle without touching
it. Try to place it
correctly the first time
as pulling it on and off
will affect how well it
stays on your nail. 6.
Gently pull the excess
over the end of your nail
letting it stick to your
finger to keep it taught.
Using your thumb smooth
the covering over your
nail working from the
centre to the edges to
ensure there are no
creases and to get a good
seal on the edges. If you
get a crease warm your
nail with a heat source
and smooth it out using
the cuticle stick
provided. 7. Finally file
the excess covering using
downward strokes at a 45
degree angle until the
excess is free then
remove. Removal: Removal
is easy, simply apply a
heat source and peel them
off. It is better for
your nails to peel the
nail wraps from one side
to the other side rather
than top to bottom or
bottom to top. Now you
are ready to apply
another design, colour
or pattern! Like anything
new it may take a few
attempts to get your
Rebel Nails perfect, but
you'll find after a few
applications that you
know exactly which nail
sizes correspond with
your own, and it will
take no time at all to
accessorise your nails
with whatever outfit you
are wearing.
Availability: In Stock
£7.99
Available
-
Rebel Nails Nail Wraps
are the UK's leading
brand of nail art
designs: bringing fashion
to the VERY tips of your
fingers and toes. Are you
looking for amazing
beautiful nails in an
instant? Rebel Nails Nail
Wraps come in a wide
range of styles and
designs to create the
stunning nails you have
always dreamed of, which
will be admired by your
friends and family. Rebel
Nails Nail Wraps are a
revolutionary new way of
accessorising your nails.
They are self adhesive
flexible coverings for
your whole nail and can
be used on natural,
acrylic and gel nails.
They will fit virtually
any length, size or
shape of nail. There is
no drying time, no
smudging, no chipping
and no gluing. Here are
just some of the benefits
of using Rebel Nails: -
Easy application, no
drying time - Various
designs to choose from -
They don't chip like
regular varnish - Your
nails will look amazing
24/7 - You can change
your look instantly -
There is no gluing and no
drying time - Receive
compliments wherever you
go. Each pack includes 16
wraps in various sizes.
Directions for use:
Applying Rebel Nails Nail
Wraps is really simple
once you know how. If you
require detailed
instructions please see
the video (scroll down),
or follow the
step-by-step guide below.
Please note, it is
important to always apply
your Rebel Nails to clean
and polish free nails. 1.
Gently push back
cuticles, buff out any
ridges and clean nails
with nail varnish remover
to remove oil, grease
and dust. 2. Select nail
size by placing the
template over your nail,
with the curved end up to
the cuticle. Ensure that
the sides do not overlap
onto the skin. The nails
can be trimmed to fit if
necessary but always do
this before peeling it
from the protective
backing. Do not trim the
length at this time. 3.
Peel the Rebel Nail from
the protective backing by
holding the straight edge
at the top. Try not to
touch the curved end as
this will affect the
adhesive backing. 4.
Using a suitable heat
source i.e. hair dryer,
warm the Rebel Nail
covering for about 10
seconds. 5. Apply nail
covering to your nail,
placing the curved end as
close as possible to the
cuticle without touching
it. Try to place it
correctly the first time
as pulling it on and off
will affect how well it
stays on your nail. 6.
Gently pull the excess
over the end of your nail
letting it stick to your
finger to keep it taught.
Using your thumb smooth
the covering over your
nail working from the
centre to the edges to
ensure there are no
creases and to get a good
seal on the edges. If you
get a crease warm your
nail with a heat source
and smooth it out using
the cuticle stick
provided. 7. Finally file
the excess covering using
downward strokes at a 45
degree angle until the
excess is free then
remove. Removal: Removal
is easy, simply apply a
heat source and peel them
off. It is better for
your nails to peel the
nail wraps from one side
to the other side rather
than top to bottom or
bottom to top. Now you
are ready to apply
another design, colour
or pattern! Like anything
new it may take a few
attempts to get your
Rebel Nails perfect, but
you'll find after a few
applications that you
know exactly which nail
sizes correspond with
your own, and it will
take no time at all to
accessorise your nails
with whatever outfit you
are wearing.
Availability: In Stock
£7.99
Available
-
Rebel Nails Nail Wraps
are the UK's leading
brand of nail art
designs: bringing fashion
to the VERY tips of your
fingers and toes. Are you
looking for amazing
beautiful nails in an
instant? Rebel Nails Nail
Wraps come in a wide
range of styles and
designs to create the
stunning nails you have
always dreamed of, which
will be admired by your
friends and family. Rebel
Nails Nail Wraps are a
revolutionary new way of
accessorising your nails.
They are self adhesive
flexible coverings for
your whole nail and can
be used on natural,
acrylic and gel nails.
They will fit virtually
any length, size or
shape of nail. There is
no drying time, no
smudging, no chipping
and no gluing. Here are
just some of the benefits
of using Rebel Nails: -
Easy application, no
drying time - Various
designs to choose from -
They don't chip like
regular varnish - Your
nails will look amazing
24/7 - You can change
your look instantly -
There is no gluing and no
drying time - Receive
compliments wherever you
go. Each pack includes 16
wraps in various sizes.
Directions for use:
Applying Rebel Nails Nail
Wraps is really simple
once you know how. If you
require detailed
instructions please see
the video (scroll down),
or follow the
step-by-step guide below.
Please note, it is
important to always apply
your Rebel Nails to clean
and polish free nails. 1.
Gently push back
cuticles, buff out any
ridges and clean nails
with nail varnish remover
to remove oil, grease
and dust. 2. Select nail
size by placing the
template over your nail,
with the curved end up to
the cuticle. Ensure that
the sides do not overlap
onto the skin. The nails
can be trimmed to fit if
necessary but always do
this before peeling it
from the protective
backing. Do not trim the
length at this time. 3.
Peel the Rebel Nail from
the protective backing by
holding the straight edge
at the top. Try not to
touch the curved end as
this will affect the
adhesive backing. 4.
Using a suitable heat
source i.e. hair dryer,
warm the Rebel Nail
covering for about 10
seconds. 5. Apply nail
covering to your nail,
placing the curved end as
close as possible to the
cuticle without touching
it. Try to place it
correctly the first time
as pulling it on and off
will affect how well it
stays on your nail. 6.
Gently pull the excess
over the end of your nail
letting it stick to your
finger to keep it taught.
Using your thumb smooth
the covering over your
nail working from the
centre to the edges to
ensure there are no
creases and to get a good
seal on the edges. If you
get a crease warm your
nail with a heat source
and smooth it out using
the cuticle stick
provided. 7. Finally file
the excess covering using
downward strokes at a 45
degree angle until the
excess is free then
remove. Removal: Removal
is easy, simply apply a
heat source and peel them
off. It is better for
your nails to peel the
nail wraps from one side
to the other side rather
than top to bottom or
bottom to top. Now you
are ready to apply
another design, colour
or pattern! Like anything
new it may take a few
attempts to get your
Rebel Nails perfect, but
you'll find after a few
applications that you
know exactly which nail
sizes correspond with
your own, and it will
take no time at all to
accessorise your nails
with whatever outfit you
are wearing.
Availability: In Stock
£7.99
Archived Product
-
Rebel Nails Nail Wraps
are the UK's leading
brand of nail art
designs: bringing fashion
to the VERY tips of your
fingers and toes. Are you
looking for amazing
beautiful nails in an
instant? Rebel Nails Nail
Wraps come in a wide
range of styles and
designs to create the
stunning nails you have
always dreamed of, which
will be admired by your
friends and family. Rebel
Nails Nail Wraps are a
revolutionary new way of
accessorising your nails.
They are self adhesive
flexible coverings for
your whole nail and can
be used on natural,
acrylic and gel nails.
They will fit virtually
any length, size or
shape of nail. There is
no drying time, no
smudging, no chipping
and no gluing. Here are
just some of the benefits
of using Rebel Nails: -
Easy application, no
drying time - Various
designs to choose from -
They don't chip like
regular varnish - Your
nails will look amazing
24/7 - You can change
your look instantly -
There is no gluing and no
drying time - Receive
compliments wherever you
go. Each pack includes 16
wraps in various sizes.
Directions for use:
Applying Rebel Nails Nail
Wraps is really simple
once you know how. If you
require detailed
instructions please see
the video (scroll down),
or follow the
step-by-step guide below.
Please note, it is
important to always apply
your Rebel Nails to clean
and polish free nails. 1.
Gently push back
cuticles, buff out any
ridges and clean nails
with nail varnish remover
to remove oil, grease
and dust. 2. Select nail
size by placing the
template over your nail,
with the curved end up to
the cuticle. Ensure that
the sides do not overlap
onto the skin. The nails
can be trimmed to fit if
necessary but always do
this before peeling it
from the protective
backing. Do not trim the
length at this time. 3.
Peel the Rebel Nail from
the protective backing by
holding the straight edge
at the top. Try not to
touch the curved end as
this will affect the
adhesive backing. 4.
Using a suitable heat
source i.e. hair dryer,
warm the Rebel Nail
covering for about 10
seconds. 5. Apply nail
covering to your nail,
placing the curved end as
close as possible to the
cuticle without touching
it. Try to place it
correctly the first time
as pulling it on and off
will affect how well it
stays on your nail. 6.
Gently pull the excess
over the end of your nail
letting it stick to your
finger to keep it taught.
Using your thumb smooth
the covering over your
nail working from the
centre to the edges to
ensure there are no
creases and to get a good
seal on the edges. If you
get a crease warm your
nail with a heat source
and smooth it out using
the cuticle stick
provided. 7. Finally file
the excess covering using
downward strokes at a 45
degree angle until the
excess is free then
remove. Removal: Removal
is easy, simply apply a
heat source and peel them
off. It is better for
your nails to peel the
nail wraps from one side
to the other side rather
than top to bottom or
bottom to top. Now you
are ready to apply
another design, colour
or pattern! Like anything
new it may take a few
attempts to get your
Rebel Nails perfect, but
you'll find after a few
applications that you
know exactly which nail
sizes correspond with
your own, and it will
take no time at all to
accessorise your nails
with whatever outfit you
are wearing.
Availability: In Stock
£7.99
Available
-
Rebel Nails Nail Wraps
are the UK's leading
brand of nail art
designs: bringing fashion
to the VERY tips of your
fingers and toes. Are you
looking for amazing
beautiful nails in an
instant? Rebel Nails Nail
Wraps come in a wide
range of styles and
designs to create the
stunning nails you have
always dreamed of, which
will be admired by your
friends and family. Rebel
Nails Nail Wraps are a
revolutionary new way of
accessorising your nails.
They are self adhesive
flexible coverings for
your whole nail and can
be used on natural,
acrylic and gel nails.
They will fit virtually
any length, size or
shape of nail. There is
no drying time, no
smudging, no chipping
and no gluing. Here are
just some of the benefits
of using Rebel Nails: -
Easy application, no
drying time - Various
designs to choose from -
They don't chip like
regular varnish - Your
nails will look amazing
24/7 - You can change
your look instantly -
There is no gluing and no
drying time - Receive
compliments wherever you
go. Each pack includes 16
wraps in various sizes.
Directions for use:
Applying Rebel Nails Nail
Wraps is really simple
once you know how. If you
require detailed
instructions please see
the video (scroll down),
or follow the
step-by-step guide below.
Please note, it is
important to always apply
your Rebel Nails to clean
and polish free nails. 1.
Gently push back
cuticles, buff out any
ridges and clean nails
with nail varnish remover
to remove oil, grease
and dust. 2. Select nail
size by placing the
template over your nail,
with the curved end up to
the cuticle. Ensure that
the sides do not overlap
onto the skin. The nails
can be trimmed to fit if
necessary but always do
this before peeling it
from the protective
backing. Do not trim the
length at this time. 3.
Peel the Rebel Nail from
the protective backing by
holding the straight edge
at the top. Try not to
touch the curved end as
this will affect the
adhesive backing. 4.
Using a suitable heat
source i.e. hair dryer,
warm the Rebel Nail
covering for about 10
seconds. 5. Apply nail
covering to your nail,
placing the curved end as
close as possible to the
cuticle without touching
it. Try to place it
correctly the first time
as pulling it on and off
will affect how well it
stays on your nail. 6.
Gently pull the excess
over the end of your nail
letting it stick to your
finger to keep it taught.
Using your thumb smooth
the covering over your
nail working from the
centre to the edges to
ensure there are no
creases and to get a good
seal on the edges. If you
get a crease warm your
nail with a heat source
and smooth it out using
the cuticle stick
provided. 7. Finally file
the excess covering using
downward strokes at a 45
degree angle until the
excess is free then
remove. Removal: Removal
is easy, simply apply a
heat source and peel them
off. It is better for
your nails to peel the
nail wraps from one side
to the other side rather
than top to bottom or
bottom to top. Now you
are ready to apply
another design, colour
or pattern! Like anything
new it may take a few
attempts to get your
Rebel Nails perfect, but
you'll find after a few
applications that you
know exactly which nail
sizes correspond with
your own, and it will
take no time at all to
accessorise your nails
with whatever outfit you
are wearing.
Availability: In Stock
£7.99
Archived Product
-
Rebel Nails Nail Wraps
are the UK's leading
brand of nail art
designs: bringing fashion
to the VERY tips of your
fingers and toes. Are you
looking for amazing
beautiful nails in an
instant? Rebel Nails Nail
Wraps come in a wide
range of styles and
designs to create the
stunning nails you have
always dreamed of, which
will be admired by your
friends and family. Rebel
Nails Nail Wraps are a
revolutionary new way of
accessorising your nails.
They are self adhesive
flexible coverings for
your whole nail and can
be used on natural,
acrylic and gel nails.
They will fit virtually
any length, size or
shape of nail. There is
no drying time, no
smudging, no chipping
and no gluing. Here are
just some of the benefits
of using Rebel Nails: -
Easy application, no
drying time - Various
designs to choose from -
They don't chip like
regular varnish - Your
nails will look amazing
24/7 - You can change
your look instantly -
There is no gluing and no
drying time - Receive
compliments wherever you
go. Both packs includes
16 wraps (16 for fingers
and 16 for toes) in
various sizes. Directions
for use: Applying Rebel
Nails Nail Wraps is
really simple once you
know how. If you require
detailed instructions
please see the video
(scroll down), or follow
the step-by-step guide
below. Please note, it
is important to always
apply your Rebel Nails to
clean and polish free
nails. 1. Gently push
back cuticles, buff out
any ridges and clean
nails with nail varnish
remover to remove oil,
grease and dust. 2.
Select nail size by
placing the template over
your nail, with the
curved end up to the
cuticle. Ensure that the
sides do not overlap onto
the skin. The nails can
be trimmed to fit if
necessary but always do
this before peeling it
from the protective
backing. Do not trim the
length at this time. 3.
Peel the Rebel Nail from
the protective backing by
holding the straight edge
at the top. Try not to
touch the curved end as
this will affect the
adhesive backing. 4.
Using a suitable heat
source i.e. hair dryer,
warm the Rebel Nail
covering for about 10
seconds. 5. Apply nail
covering to your nail,
placing the curved end as
close as possible to the
cuticle without touching
it. Try to place it
correctly the first time
as pulling it on and off
will affect how well it
stays on your nail. 6.
Gently pull the excess
over the end of your nail
letting it stick to your
finger to keep it taught.
Using your thumb smooth
the covering over your
nail working from the
centre to the edges to
ensure there are no
creases and to get a good
seal on the edges. If you
get a crease warm your
nail with a heat source
and smooth it out using
the cuticle stick
provided. 7. Finally file
the excess covering using
downward strokes at a 45
degree angle until the
excess is free then
remove. Removal: Removal
is easy, simply apply a
heat source and peel them
off. It is better for
your nails to peel the
nail wraps from one side
to the other side rather
than top to bottom or
bottom to top. Now you
are ready to apply
another design, colour
or pattern! Like anything
new it may take a few
attempts to get your
Rebel Nails perfect, but
you'll find after a few
applications that you
know exactly which nail
sizes correspond with
your own, and it will
take no time at all to
accessorise your nails
with whatever outfit you
are wearing.
Availability: In Stock
£11.95
Available
-
Rebel Nails Nail Wraps
are the UK's leading
brand of nail art
designs: bringing fashion
to the VERY tips of your
fingers and toes. Are you
looking for amazing
beautiful nails in an
instant? Rebel Nails Nail
Wraps come in a wide
range of styles and
designs to create the
stunning nails you have
always dreamed of, which
will be admired by your
friends and family. Rebel
Nails Nail Wraps are a
revolutionary new way of
accessorising your nails.
They are self adhesive
flexible coverings for
your whole nail and can
be used on natural,
acrylic and gel nails.
They will fit virtually
any length, size or
shape of nail. There is
no drying time, no
smudging, no chipping
and no gluing. Here are
just some of the benefits
of using Rebel Nails: -
Easy application, no
drying time - Various
designs to choose from -
They don't chip like
regular varnish - Your
nails will look amazing
24/7 - You can change
your look instantly -
There is no gluing and no
drying time - Receive
compliments wherever you
go. Each pack includes 16
wraps in various sizes.
Directions for use:
Applying Rebel Nails Nail
Wraps is really simple
once you know how. If you
require detailed
instructions please see
the video (scroll down),
or follow the
step-by-step guide below.
Please note, it is
important to always apply
your Rebel Nails to clean
and polish free nails. 1.
Gently push back
cuticles, buff out any
ridges and clean nails
with nail varnish remover
to remove oil, grease
and dust. 2. Select nail
size by placing the
template over your nail,
with the curved end up to
the cuticle. Ensure that
the sides do not overlap
onto the skin. The nails
can be trimmed to fit if
necessary but always do
this before peeling it
from the protective
backing. Do not trim the
length at this time. 3.
Peel the Rebel Nail from
the protective backing by
holding the straight edge
at the top. Try not to
touch the curved end as
this will affect the
adhesive backing. 4.
Using a suitable heat
source i.e. hair dryer,
warm the Rebel Nail
covering for about 10
seconds. 5. Apply nail
covering to your nail,
placing the curved end as
close as possible to the
cuticle without touching
it. Try to place it
correctly the first time
as pulling it on and off
will affect how well it
stays on your nail. 6.
Gently pull the excess
over the end of your nail
letting it stick to your
finger to keep it taught.
Using your thumb smooth
the covering over your
nail working from the
centre to the edges to
ensure there are no
creases and to get a good
seal on the edges. If you
get a crease warm your
nail with a heat source
and smooth it out using
the cuticle stick
provided. 7. Finally file
the excess covering using
downward strokes at a 45
degree angle until the
excess is free then
remove. Removal: Removal
is easy, simply apply a
heat source and peel them
off. It is better for
your nails to peel the
nail wraps from one side
to the other side rather
than top to bottom or
bottom to top. Now you
are ready to apply
another design, colour
or pattern! Like anything
new it may take a few
attempts to get your
Rebel Nails perfect, but
you'll find after a few
applications that you
know exactly which nail
sizes correspond with
your own, and it will
take no time at all to
accessorise your nails
with whatever outfit you
are wearing.
Availability: In Stock
£7.99
Archived Product
-
Rebel Nails Nail Wraps
are the UK's leading
brand of nail art
designs: bringing fashion
to the VERY tips of your
fingers and toes. Are you
looking for amazing
beautiful nails in an
instant? Rebel Nails Nail
Wraps come in a wide
range of styles and
designs to create the
stunning nails you have
always dreamed of, which
will be admired by your
friends and family. Rebel
Nails Nail Wraps are a
revolutionary new way of
accessorising your nails.
They are self adhesive
flexible coverings for
your whole nail and can
be used on natural,
acrylic and gel nails.
They will fit virtually
any length, size or
shape of nail. There is
no drying time, no
smudging, no chipping
and no gluing. Here are
just some of the benefits
of using Rebel Nails: -
Easy application, no
drying time - Various
designs to choose from -
They don't chip like
regular varnish - Your
nails will look amazing
24/7 - You can change
your look instantly -
There is no gluing and no
drying time - Receive
compliments wherever you
go. Each pack includes 16
wraps in various sizes.
Directions for use:
Applying Rebel Nails Nail
Wraps is really simple
once you know how. If you
require detailed
instructions please see
the video (scroll down),
or follow the
step-by-step guide below.
Please note, it is
important to always apply
your Rebel Nails to clean
and polish free nails. 1.
Gently push back
cuticles, buff out any
ridges and clean nails
with nail varnish remover
to remove oil, grease
and dust. 2. Select nail
size by placing the
template over your nail,
with the curved end up to
the cuticle. Ensure that
the sides do not overlap
onto the skin. The nails
can be trimmed to fit if
necessary but always do
this before peeling it
from the protective
backing. Do not trim the
length at this time. 3.
Peel the Rebel Nail from
the protective backing by
holding the straight edge
at the top. Try not to
touch the curved end as
this will affect the
adhesive backing. 4.
Using a suitable heat
source i.e. hair dryer,
warm the Rebel Nail
covering for about 10
seconds. 5. Apply nail
covering to your nail,
placing the curved end as
close as possible to the
cuticle without touching
it. Try to place it
correctly the first time
as pulling it on and off
will affect how well it
stays on your nail. 6.
Gently pull the excess
over the end of your nail
letting it stick to your
finger to keep it taught.
Using your thumb smooth
the covering over your
nail working from the
centre to the edges to
ensure there are no
creases and to get a good
seal on the edges. If you
get a crease warm your
nail with a heat source
and smooth it out using
the cuticle stick
provided. 7. Finally file
the excess covering using
downward strokes at a 45
degree angle until the
excess is free then
remove. Removal: Removal
is easy, simply apply a
heat source and peel them
off. It is better for
your nails to peel the
nail wraps from one side
to the other side rather
than top to bottom or
bottom to top. Now you
are ready to apply
another design, colour
or pattern! Like anything
new it may take a few
attempts to get your
Rebel Nails perfect, but
you'll find after a few
applications that you
know exactly which nail
sizes correspond with
your own, and it will
take no time at all to
accessorise your nails
with whatever outfit you
are wearing.
Availability: In Stock
£7.99
Available
-
Rebel Nails Nail Wraps
are the UK's leading
brand of nail art
designs: bringing fashion
to the VERY tips of your
fingers and toes. Are you
looking for amazing
beautiful nails in an
instant? Rebel Nails Nail
Wraps come in a wide
range of styles and
designs to create the
stunning nails you have
always dreamed of, which
will be admired by your
friends and family. Rebel
Nails Nail Wraps are a
revolutionary new way of
accessorising your nails.
They are self adhesive
flexible coverings for
your whole nail and can
be used on natural,
acrylic and gel nails.
They will fit virtually
any length, size or
shape of nail. There is
no drying time, no
smudging, no chipping
and no gluing. Here are
just some of the benefits
of using Rebel Nails: -
Easy application, no
drying time - Various
designs to choose from -
They don't chip like
regular varnish - Your
nails will look amazing
24/7 - You can change
your look instantly -
There is no gluing and no
drying time - Receive
compliments wherever you
go. Each pack includes 16
wraps in various sizes.
Directions for use:
Applying Rebel Nails Nail
Wraps is really simple
once you know how. If you
require detailed
instructions please see
the video (scroll down),
or follow the
step-by-step guide below.
Please note, it is
important to always apply
your Rebel Nails to clean
and polish free nails. 1.
Gently push back
cuticles, buff out any
ridges and clean nails
with nail varnish remover
to remove oil, grease
and dust. 2. Select nail
size by placing the
template over your nail,
with the curved end up to
the cuticle. Ensure that
the sides do not overlap
onto the skin. The nails
can be trimmed to fit if
necessary but always do
this before peeling it
from the protective
backing. Do not trim the
length at this time. 3.
Peel the Rebel Nail from
the protective backing by
holding the straight edge
at the top. Try not to
touch the curved end as
this will affect the
adhesive backing. 4.
Using a suitable heat
source i.e. hair dryer,
warm the Rebel Nail
covering for about 10
seconds. 5. Apply nail
covering to your nail,
placing the curved end as
close as possible to the
cuticle without touching
it. Try to place it
correctly the first time
as pulling it on and off
will affect how well it
stays on your nail. 6.
Gently pull the excess
over the end of your nail
letting it stick to your
finger to keep it taught.
Using your thumb smooth
the covering over your
nail working from the
centre to the edges to
ensure there are no
creases and to get a good
seal on the edges. If you
get a crease warm your
nail with a heat source
and smooth it out using
the cuticle stick
provided. 7. Finally file
the excess covering using
downward strokes at a 45
degree angle until the
excess is free then
remove. Removal: Removal
is easy, simply apply a
heat source and peel them
off. It is better for
your nails to peel the
nail wraps from one side
to the other side rather
than top to bottom or
bottom to top. Now you
are ready to apply
another design, colour
or pattern! Like anything
new it may take a few
attempts to get your
Rebel Nails perfect, but
you'll find after a few
applications that you
know exactly which nail
sizes correspond with
your own, and it will
take no time at all to
accessorise your nails
with whatever outfit you
are wearing.
Availability: In Stock
£7.99
Available
-
Solid Chrome Nail Wraps
are nails inc's way of
bringing the hottest
catwalk trends to your
nails. nails inc Nail
Wraps are easy to use and
will create a show
stopping finish. Try this
exciting new trend which
is perfect for parties,
special events or
holidays. Each nails inc
Nail Wrap pack includes
24 wraps for a full set
of hands and feet (with
spares)! Directions for
use: 1. Remove any nail
polish and push back your
cuticles using a hoof
stick. 2. File your nails
to the desired shape and
length. For best results
always make sure your
nails are slightly longer
than the top of your
finger. 3. Gently buff
your nails using a nail
buffer to remove surface
shine. 4. Select the
nails inc Nail Wrap that
is the closest size to
your nail. Trim to fit if
needed using nail
scissors. Don't worry
about excess length as
this will be trimmed
later. 5. Heat the wrap
for a few seconds using a
hair dryer on a gentle
heat. The wrap should
start to soften and bend.
6. Carefully place the
wrap on the nail starting
at the cuticle (colour
side facing upwards).
Applying firm pressure,
push the wrap onto one
side of the nail and then
to the other until the
whole wrap is neatly
applied to the nail. 7.
Re-apply heat for a few
seconds and push firmly
over the entire nails for
a secure fit. If you
experience any creasing;
re-heat, gently lift the
wrap off the nail and
re-apply adding further
heat if necessary. 8.
Trim the end of the wrap
and then file the excess
in a downward motion
either using a glass file
or a wooden file with a
very fine grain.
Availability: In Stock
£6.75
Archived Product
-
Rebel Nails Nail Wraps
are the UK's leading
brand of nail art
designs: bringing fashion
to the VERY tips of your
fingers and toes. Are you
looking for amazing
beautiful nails in an
instant? Rebel Nails Nail
Wraps come in a wide
range of styles and
designs to create the
stunning nails you have
always dreamed of, which
will be admired by your
friends and family. Rebel
Nails Nail Wraps are a
revolutionary new way of
accessorising your nails.
They are self adhesive
flexible coverings for
your whole nail and can
be used on natural,
acrylic and gel nails.
They will fit virtually
any length, size or
shape of nail. There is
no drying time, no
smudging, no chipping
and no gluing. Here are
just some of the benefits
of using Rebel Nails: -
Easy application, no
drying time - Various
designs to choose from -
They don't chip like
regular varnish - Your
nails will look amazing
24/7 - You can change
your look instantly -
There is no gluing and no
drying time - Receive
compliments wherever you
go. Perfect 22 Carat Gold
nails every time. Each
pack includes 16 wraps in
various sizes. Directions
for use: Applying Rebel
Nails Nail Wraps is
really simple once you
know how. If you require
detailed instructions
please see the video
(scroll down), or follow
the step-by-step guide
below. Please note, it
is important to always
apply your Rebel Nails to
clean and polish free
nails. 1. Gently push
back cuticles, buff out
any ridges and clean
nails with nail varnish
remover to remove oil,
grease and dust. 2.
Select nail size by
placing the template over
your nail, with the
curved end up to the
cuticle. Ensure that the
sides do not overlap onto
the skin. The nails can
be trimmed to fit if
necessary but always do
this before peeling it
from the protective
backing. Do not trim the
length at this time. 3.
Peel the Rebel Nail from
the protective backing by
holding the straight edge
at the top. Try not to
touch the curved end as
this will affect the
adhesive backing. 4.
Using a suitable heat
source i.e. hair dryer,
warm the Rebel Nail
covering for about 10
seconds. 5. Apply nail
covering to your nail,
placing the curved end as
close as possible to the
cuticle without touching
it. Try to place it
correctly the first time
as pulling it on and off
will affect how well it
stays on your nail. 6.
Gently pull the excess
over the end of your nail
letting it stick to your
finger to keep it taught.
Using your thumb smooth
the covering over your
nail working from the
centre to the edges to
ensure there are no
creases and to get a good
seal on the edges. If you
get a crease warm your
nail with a heat source
and smooth it out using
the cuticle stick
provided. 7. Finally file
the excess covering using
downward strokes at a 45
degree angle until the
excess is free then
remove. Removal: Removal
is easy, simply apply a
heat source and peel them
off. It is better for
your nails to peel the
nail wraps from one side
to the other side rather
than top to bottom or
bottom to top. Now you
are ready to apply
another design, colour
or pattern! Like anything
new it may take a few
attempts to get your
Rebel Nails perfect, but
you'll find after a few
applications that you
know exactly which nail
sizes correspond with
your own, and it will
take no time at all to
accessorise your nails
with whatever outfit you
are wearing.
Availability: In Stock
£14.95
Available
-
Pink Cheetah Nail Wraps
are nails inc's way of
bringing the hottest
catwalk trends to your
nails. nails inc Nail
Wraps are easy to use and
will create a show
stopping finish. Try this
exciting new trend which
is perfect for parties,
special events or
holidays. Each nails inc
Nail Wrap pack includes
24 wraps for a full set
of hands and feet (with
spares)!
Availability: In Stock
£5.96
Archived Product
-
Rebel Nails Nail Wraps
are the UK's leading
brand of nail art
designs: bringing fashion
to the VERY tips of your
fingers and toes. Are you
looking for amazing
beautiful nails in an
instant? Rebel Nails Nail
Wraps come in a wide
range of styles and
designs to create the
stunning nails you have
always dreamed of, which
will be admired by your
friends and family. Rebel
Nails Nail Wraps are a
revolutionary new way of
accessorising your nails.
They are self adhesive
flexible coverings for
your whole nail and can
be used on natural,
acrylic and gel nails.
They will fit virtually
any length, size or
shape of nail. There is
no drying time, no
smudging, no chipping
and no gluing. Here are
just some of the benefits
of using Rebel Nails: -
Easy application, no
drying time - Various
designs to choose from -
They don't chip like
regular varnish - Your
nails will look amazing
24/7 - You can change
your look instantly -
There is no gluing and no
drying time - Receive
compliments wherever you
go. Each pack includes 16
wraps in various sizes.
Directions for use:
Applying Rebel Nails Nail
Wraps is really simple
once you know how. If you
require detailed
instructions please see
the video (scroll down),
or follow the
step-by-step guide below.
Please note, it is
important to always apply
your Rebel Nails to clean
and polish free nails. 1.
Gently push back
cuticles, buff out any
ridges and clean nails
with nail varnish remover
to remove oil, grease
and dust. 2. Select nail
size by placing the
template over your nail,
with the curved end up to
the cuticle. Ensure that
the sides do not overlap
onto the skin. The nails
can be trimmed to fit if
necessary but always do
this before peeling it
from the protective
backing. Do not trim the
length at this time. 3.
Peel the Rebel Nail from
the protective backing by
holding the straight edge
at the top. Try not to
touch the curved end as
this will affect the
adhesive backing. 4.
Using a suitable heat
source i.e. hair dryer,
warm the Rebel Nail
covering for about 10
seconds. 5. Apply nail
covering to your nail,
placing the curved end as
close as possible to the
cuticle without touching
it. Try to place it
correctly the first time
as pulling it on and off
will affect how well it
stays on your nail. 6.
Gently pull the excess
over the end of your nail
letting it stick to your
finger to keep it taught.
Using your thumb smooth
the covering over your
nail working from the
centre to the edges to
ensure there are no
creases and to get a good
seal on the edges. If you
get a crease warm your
nail with a heat source
and smooth it out using
the cuticle stick
provided. 7. Finally file
the excess covering using
downward strokes at a 45
degree angle until the
excess is free then
remove. Removal: Removal
is easy, simply apply a
heat source and peel them
off. It is better for
your nails to peel the
nail wraps from one side
to the other side rather
than top to bottom or
bottom to top. Now you
are ready to apply
another design, colour
or pattern! Like anything
new it may take a few
attempts to get your
Rebel Nails perfect, but
you'll find after a few
applications that you
know exactly which nail
sizes correspond with
your own, and it will
take no time at all to
accessorise your nails
with whatever outfit you
are wearing.
Availability: In Stock
£7.99
Available
-
Rebel Nails Nail Wraps
are the UK's leading
brand of nail art
designs: bringing fashion
to the VERY tips of your
fingers and toes. Are you
looking for amazing
beautiful nails in an
instant? Rebel Nails Nail
Wraps come in a wide
range of styles and
designs to create the
stunning nails you have
always dreamed of, which
will be admired by your
friends and family. Rebel
Nails Nail Wraps are a
revolutionary new way of
accessorising your nails.
They are self adhesive
flexible coverings for
your whole nail and can
be used on natural,
acrylic and gel nails.
They will fit virtually
any length, size or
shape of nail. There is
no drying time, no
smudging, no chipping
and no gluing. Here are
just some of the benefits
of using Rebel Nails: -
Easy application, no
drying time - Various
designs to choose from -
They don't chip like
regular varnish - Your
nails will look amazing
24/7 - You can change
your look instantly -
There is no gluing and no
drying time - Receive
compliments wherever you
go. Perfect 22 Carat Gold
nails every time. Each
pack includes 16 wraps in
various sizes. Directions
for use: Applying Rebel
Nails Nail Wraps is
really simple once you
know how. If you require
detailed instructions
please see the video
(scroll down), or follow
the step-by-step guide
below. Please note, it
is important to always
apply your Rebel Nails to
clean and polish free
nails. 1. Gently push
back cuticles, buff out
any ridges and clean
nails with nail varnish
remover to remove oil,
grease and dust. 2.
Select nail size by
placing the template over
your nail, with the
curved end up to the
cuticle. Ensure that the
sides do not overlap onto
the skin. The nails can
be trimmed to fit if
necessary but always do
this before peeling it
from the protective
backing. Do not trim the
length at this time. 3.
Peel the Rebel Nail from
the protective backing by
holding the straight edge
at the top. Try not to
touch the curved end as
this will affect the
adhesive backing. 4.
Using a suitable heat
source i.e. hair dryer,
warm the Rebel Nail
covering for about 10
seconds. 5. Apply nail
covering to your nail,
placing the curved end as
close as possible to the
cuticle without touching
it. Try to place it
correctly the first time
as pulling it on and off
will affect how well it
stays on your nail. 6.
Gently pull the excess
over the end of your nail
letting it stick to your
finger to keep it taught.
Using your thumb smooth
the covering over your
nail working from the
centre to the edges to
ensure there are no
creases and to get a good
seal on the edges. If you
get a crease warm your
nail with a heat source
and smooth it out using
the cuticle stick
provided. 7. Finally file
the excess covering using
downward strokes at a 45
degree angle until the
excess is free then
remove. Removal: Removal
is easy, simply apply a
heat source and peel them
off. It is better for
your nails to peel the
nail wraps from one side
to the other side rather
than top to bottom or
bottom to top. Now you
are ready to apply
another design, colour
or pattern! Like anything
new it may take a few
attempts to get your
Rebel Nails perfect, but
you'll find after a few
applications that you
know exactly which nail
sizes correspond with
your own, and it will
take no time at all to
accessorise your nails
with whatever outfit you
are wearing.
Availability: In Stock
£7.99
Archived Product
-
Rebel Nails Nail Wraps
are the UK's leading
brand of nail art
designs: bringing fashion
to the VERY tips of your
fingers and toes. Are you
looking for amazing
beautiful nails in an
instant? Rebel Nails Nail
Wraps come in a wide
range of styles and
designs to create the
stunning nails you have
always dreamed of, which
will be admired by your
friends and family. Rebel
Nails Nail Wraps are a
revolutionary new way of
accessorising your nails.
They are self adhesive
flexible coverings for
your whole nail and can
be used on natural,
acrylic and gel nails.
They will fit virtually
any length, size or
shape of nail. There is
no drying time, no
smudging, no chipping
and no gluing. Here are
just some of the benefits
of using Rebel Nails: -
Easy application, no
drying time - Various
designs to choose from -
They don't chip like
regular varnish - Your
nails will look amazing
24/7 - You can change
your look instantly -
There is no gluing and no
drying time - Receive
compliments wherever you
go. Each pack includes 16
wraps in various sizes.
Directions for use:
Applying Rebel Nails Nail
Wraps is really simple
once you know how. If you
require detailed
instructions please see
the video (scroll down),
or follow the
step-by-step guide below.
Please note, it is
important to always apply
your Rebel Nails to clean
and polish free nails. 1.
Gently push back
cuticles, buff out any
ridges and clean nails
with nail varnish remover
to remove oil, grease
and dust. 2. Select nail
size by placing the
template over your nail,
with the curved end up to
the cuticle. Ensure that
the sides do not overlap
onto the skin. The nails
can be trimmed to fit if
necessary but always do
this before peeling it
from the protective
backing. Do not trim the
length at this time. 3.
Peel the Rebel Nail from
the protective backing by
holding the straight edge
at the top. Try not to
touch the curved end as
this will affect the
adhesive backing. 4.
Using a suitable heat
source i.e. hair dryer,
warm the Rebel Nail
covering for about 10
seconds. 5. Apply nail
covering to your nail,
placing the curved end as
close as possible to the
cuticle without touching
it. Try to place it
correctly the first time
as pulling it on and off
will affect how well it
stays on your nail. 6.
Gently pull the excess
over the end of your nail
letting it stick to your
finger to keep it taught.
Using your thumb smooth
the covering over your
nail working from the
centre to the edges to
ensure there are no
creases and to get a good
seal on the edges. If you
get a crease warm your
nail with a heat source
and smooth it out using
the cuticle stick
provided. 7. Finally file
the excess covering using
downward strokes at a 45
degree angle until the
excess is free then
remove. Removal: Removal
is easy, simply apply a
heat source and peel them
off. It is better for
your nails to peel the
nail wraps from one side
to the other side rather
than top to bottom or
bottom to top. Now you
are ready to apply
another design, colour
or pattern! Like anything
new it may take a few
attempts to get your
Rebel Nails perfect, but
you'll find after a few
applications that you
know exactly which nail
sizes correspond with
your own, and it will
take no time at all to
accessorise your nails
with whatever outfit you
are wearing.
Availability: In Stock
£7.99
Archived Product
-
Create the most
incredible full coverage
3D glitter nails that you
have ever seen! nails inc
Bling It On Hollogram is
easy to apply at home and
is the fastest way to
transform your look. Add
instant glam to any look
with this collection.
Encrust your nails with
midnight glitter
particles. nails inc
Bling it on Hologram
contains: - 2 x Bling It
On Hologram glitter pots
- Floral Street polish
4ml - Kensington Caviar
top coat 4ml - 1 x
dusting brush - 1 x
application tray
Directions for use: -
Pour a small amount of
your chosen Bling it on
Hologram into the
application tray. - Apply
one coat of Black Taxi
nail polish to one nail.
- Gently press your
polished nail into the
glitter whilst the polish
is wet. Roll finger side
to side to ensure nail is
fully coated. - Gently
press the glitter with
your finger to secure it
to the polish. - Dust off
any glitter from your
fingers, using the
enclosed dusting brush. -
Repeat on all nails -
Finish with one coat of
Kensington caviar top
coat to seal in the
effect - Pour any
remaining glitter from
the tray back into the
pot using the painted end
of the application tray.
Hurry be the first to
sport this stunning new
glitter trend!
Availability: In Stock
£20.00
Available
-
Union Jack Nail Wraps are
nails inc's way of
bringing the hottest
catwalk trends to your
nails. nails inc Nail
Wraps are easy to use and
will create a show
stopping finish. Try this
exciting new trend which
is perfect for parties,
special events or
holidays. Each nails inc
Nail Wrap pack includes
24 wraps for a full set
of hands and feet (with
spares)!
Availability: In Stock
£7.95
Available
-
Rebel Nails Nail Wraps
are the UK's leading
brand of nail art
designs: bringing fashion
to the VERY tips of your
fingers and toes. Are you
looking for amazing
beautiful nails in an
instant? Rebel Nails Nail
Wraps come in a wide
range of styles and
designs to create the
stunning nails you have
always dreamed of, which
will be admired by your
friends and family. Rebel
Nails Nail Wraps are a
revolutionary new way of
accessorising your nails.
They are self adhesive
flexible coverings for
your whole nail and can
be used on natural,
acrylic and gel nails.
They will fit virtually
any length, size or
shape of nail. There is
no drying time, no
smudging, no chipping
and no gluing. Here are
just some of the benefits
of using Rebel Nails: -
Easy application, no
drying time - Various
designs to choose from -
They don't chip like
regular varnish - Your
nails will look amazing
24/7 - You can change
your look instantly -
There is no gluing and no
drying time - Receive
compliments wherever you
go. Perfect 22 Carat Gold
nails every time. Each
pack includes 16 wraps in
various sizes. Directions
for use: Applying Rebel
Nails Nail Wraps is
really simple once you
know how. If you require
detailed instructions
please see the video
(scroll down), or follow
the step-by-step guide
below. Please note, it
is important to always
apply your Rebel Nails to
clean and polish free
nails. 1. Gently push
back cuticles, buff out
any ridges and clean
nails with nail varnish
remover to remove oil,
grease and dust. 2.
Select nail size by
placing the template over
your nail, with the
curved end up to the
cuticle. Ensure that the
sides do not overlap onto
the skin. The nails can
be trimmed to fit if
necessary but always do
this before peeling it
from the protective
backing. Do not trim the
length at this time. 3.
Peel the Rebel Nail from
the protective backing by
holding the straight edge
at the top. Try not to
touch the curved end as
this will affect the
adhesive backing. 4.
Using a suitable heat
source i.e. hair dryer,
warm the Rebel Nail
covering for about 10
seconds. 5. Apply nail
covering to your nail,
placing the curved end as
close as possible to the
cuticle without touching
it. Try to place it
correctly the first time
as pulling it on and off
will affect how well it
stays on your nail. 6.
Gently pull the excess
over the end of your nail
letting it stick to your
finger to keep it taught.
Using your thumb smooth
the covering over your
nail working from the
centre to the edges to
ensure there are no
creases and to get a good
seal on the edges. If you
get a crease warm your
nail with a heat source
and smooth it out using
the cuticle stick
provided. 7. Finally file
the excess covering using
downward strokes at a 45
degree angle until the
excess is free then
remove. Removal: Removal
is easy, simply apply a
heat source and peel them
off. It is better for
your nails to peel the
nail wraps from one side
to the other side rather
than top to bottom or
bottom to top. Now you
are ready to apply
another design, colour
or pattern! Like anything
new it may take a few
attempts to get your
Rebel Nails perfect, but
you'll find after a few
applications that you
know exactly which nail
sizes correspond with
your own, and it will
take no time at all to
accessorise your nails
with whatever outfit you
are wearing.
Availability: In Stock
£7.99
Archived Product
-
Rebel Nails Nail Wraps
are the UK's leading
brand of nail art
designs: bringing fashion
to the VERY tips of your
fingers and toes. Are you
looking for amazing
beautiful nails in an
instant? Rebel Nails Nail
Wraps come in a wide
range of styles and
designs to create the
stunning nails you have
always dreamed of, which
will be admired by your
friends and family. Rebel
Nails Nail Wraps are a
revolutionary new way of
accessorising your nails.
They are self adhesive
flexible coverings for
your whole nail and can
be used on natural,
acrylic and gel nails.
They will fit virtually
any length, size or
shape of nail. There is
no drying time, no
smudging, no chipping
and no gluing. Here are
just some of the benefits
of using Rebel Nails: -
Easy application, no
drying time - Various
designs to choose from -
They don't chip like
regular varnish - Your
nails will look amazing
24/7 - You can change
your look instantly -
There is no gluing and no
drying time - Receive
compliments wherever you
go. Each pack includes 16
wraps in various sizes.
Directions for use:
Applying Rebel Nails Nail
Wraps is really simple
once you know how. If you
require detailed
instructions please see
the video (scroll down),
or follow the
step-by-step guide below.
Please note, it is
important to always apply
your Rebel Nails to clean
and polish free nails. 1.
Gently push back
cuticles, buff out any
ridges and clean nails
with nail varnish remover
to remove oil, grease
and dust. 2. Select nail
size by placing the
template over your nail,
with the curved end up to
the cuticle. Ensure that
the sides do not overlap
onto the skin. The nails
can be trimmed to fit if
necessary but always do
this before peeling it
from the protective
backing. Do not trim the
length at this time. 3.
Peel the Rebel Nail from
the protective backing by
holding the straight edge
at the top. Try not to
touch the curved end as
this will affect the
adhesive backing. 4.
Using a suitable heat
source i.e. hair dryer,
warm the Rebel Nail
covering for about 10
seconds. 5. Apply nail
covering to your nail,
placing the curved end as
close as possible to the
cuticle without touching
it. Try to place it
correctly the first time
as pulling it on and off
will affect how well it
stays on your nail. 6.
Gently pull the excess
over the end of your nail
letting it stick to your
finger to keep it taught.
Using your thumb smooth
the covering over your
nail working from the
centre to the edges to
ensure there are no
creases and to get a good
seal on the edges. If you
get a crease warm your
nail with a heat source
and smooth it out using
the cuticle stick
provided. 7. Finally file
the excess covering using
downward strokes at a 45
degree angle until the
excess is free then
remove. Removal: Removal
is easy, simply apply a
heat source and peel them
off. It is better for
your nails to peel the
nail wraps from one side
to the other side rather
than top to bottom or
bottom to top. Now you
are ready to apply
another design, colour
or pattern! Like anything
new it may take a few
attempts to get your
Rebel Nails perfect, but
you'll find after a few
applications that you
know exactly which nail
sizes correspond with
your own, and it will
take no time at all to
accessorise your nails
with whatever outfit you
are wearing.
Availability: In Stock
£7.99
Archived Product
-
Rebel Nails Nail Wraps
are the UK's leading
brand of nail art
designs: bringing fashion
to the VERY tips of your
fingers and toes. Are you
looking for amazing
beautiful nails in an
instant? Rebel Nails Nail
Wraps come in a wide
range of styles and
designs to create the
stunning nails you have
always dreamed of, which
will be admired by your
friends and family. Rebel
Nails Nail Wraps are a
revolutionary new way of
accessorising your nails.
They are self adhesive
flexible coverings for
your whole nail and can
be used on natural,
acrylic and gel nails.
They will fit virtually
any length, size or
shape of nail. There is
no drying time, no
smudging, no chipping
and no gluing. Here are
just some of the benefits
of using Rebel Nails: -
Easy application, no
drying time - Various
designs to choose from -
They don't chip like
regular varnish - Your
nails will look amazing
24/7 - You can change
your look instantly -
There is no gluing and no
drying time - Receive
compliments wherever you
go. Each pack includes 16
wraps in various sizes.
Directions for use:
Applying Rebel Nails Nail
Wraps is really simple
once you know how. If you
require detailed
instructions please see
the video (scroll down),
or follow the
step-by-step guide below.
Please note, it is
important to always apply
your Rebel Nails to clean
and polish free nails. 1.
Gently push back
cuticles, buff out any
ridges and clean nails
with nail varnish remover
to remove oil, grease
and dust. 2. Select nail
size by placing the
template over your nail,
with the curved end up to
the cuticle. Ensure that
the sides do not overlap
onto the skin. The nails
can be trimmed to fit if
necessary but always do
this before peeling it
from the protective
backing. Do not trim the
length at this time. 3.
Peel the Rebel Nail from
the protective backing by
holding the straight edge
at the top. Try not to
touch the curved end as
this will affect the
adhesive backing. 4.
Using a suitable heat
source i.e. hair dryer,
warm the Rebel Nail
covering for about 10
seconds. 5. Apply nail
covering to your nail,
placing the curved end as
close as possible to the
cuticle without touching
it. Try to place it
correctly the first time
as pulling it on and off
will affect how well it
stays on your nail. 6.
Gently pull the excess
over the end of your nail
letting it stick to your
finger to keep it taught.
Using your thumb smooth
the covering over your
nail working from the
centre to the edges to
ensure there are no
creases and to get a good
seal on the edges. If you
get a crease warm your
nail with a heat source
and smooth it out using
the cuticle stick
provided. 7. Finally file
the excess covering using
downward strokes at a 45
degree angle until the
excess is free then
remove. Removal: Removal
is easy, simply apply a
heat source and peel them
off. It is better for
your nails to peel the
nail wraps from one side
to the other side rather
than top to bottom or
bottom to top. Now you
are ready to apply
another design, colour
or pattern! Like anything
new it may take a few
attempts to get your
Rebel Nails perfect, but
you'll find after a few
applications that you
know exactly which nail
sizes correspond with
your own, and it will
take no time at all to
accessorise your nails
with whatever outfit you
are wearing.
Availability: In Stock
£7.99
Archived Product
-
Create the most
incredible full coverage
3D glitter nails that you
have ever seen! nails inc
Bling it on Rocks is easy
to apply at home and is
the fastest way to
transform your look. Add
instant glam to any look
with this collection.
Encrust your nails with
midnight glitter
particles. nails inc
Bling it on Rocks
contains: - 2 x Bling It
On Rocks glitter pots -
Black Taxi polish 4ml -
Kensington Caviar top
coat 4ml - 1 x dusting
brush - 1 x application
tray Directions for use:
- Pour a small amount of
your chosen Bling it on
Rocks into the
application tray. - Apply
one coat of Black Taxi
nail polish to one nail.
- Gently press your
polished nail into the
glitter whilst the polish
is wet. Roll finger side
to side to ensure nail is
fully coated. - Gently
press the glitter with
your finger to secure it
to the polish. - Dust off
any glitter from your
fingers, using the
enclosed dusting brush. -
Repeat on all nails -
Finish with one coat of
Kensington caviar top
coat to seal in the
effect - Pour any
remaining glitter from
the tray back into the
pot using the painted end
of the application tray.
Hurry be the first to
sport this stunning new
glitter trend!
Availability: In Stock
£20.00
Available
-
Create the most
incredible full coverage
3D glitter nails that you
have ever seen! nails inc
Bling it on Rocks is easy
to apply at home and is
the fastest way to
transform your look. Add
instant glam to any look
with this collection.
Encrust your nails with
midnight glitter
particles. nails inc
Bling it on Midnight
contains: - 2 x Bling It
On Midnight glitter pots
- Blenheim Terrace polish
4ml - Kensington Caviar
top coat 4ml - 1 x
dusting brush - 1 x
application tray Hurry be
the first to sport this
stunning new glitter
trend!
Availability: In Stock
£20.00
Available
-
Jessica's Nail Art
Designer Palette allows
you to do your very own
custom works of nail art.
Discover your inner
"artiste", be creative
and capture your
individual style like
never before. This
collection is the full
comprehensive set and
contains 18 Jessica nail
polish paints that are
used in professional nail
art. Each colour has a
unique striping brush and
the set is complete with
lots of design ideas
inside the box sleeve.
The colours included are:
- Red - Purple - Pink -
Lavender - Berry - Orange
- Green - Blue - Black -
Brown - Pink Glitter -
Gold Glitter - Silver
Glitter - Plain Glitter -
White - Silver - Gold -
Luscious Yellow
Availability: In Stock
£76.75
Available
-
Style No. 10 - Naturally
French. Short length.
Bare. Faded white line.
Half moon. 24 flexible,
durable and comfortable
nails. Sized for everyday
use. Pink gel glue
inside. From the Beauty
Experts at Cosmopolitan
comes RealTouch Amazingly
Real Nails, a collection
of beautifully natural
salon-quality nails.
Availability: In Stock
£5.50
 Denmark